When it comes to engine repairs, one of the most critical tasks is replacing the head gasket. While this procedure can save your engine from further damage, it is not without its own set of challenges. In this blog post, we will discuss some of the common problems that can occur after a head gasket replacement. Understanding these issues will help you identify potential setbacks and ensure the longevity of your engine’s health.
1. Improper Torque Specifications
One of the primary causes of problems after a head gasket replacement is improper torque specifications. The head bolts must be tightened to the manufacturer’s recommended specifications. If they are over tightened or under tightened, it can lead to various issues such as coolant leaks, loss of compression, and even engine misfires. To avoid these problems, always refer to the service manual and follow the recommended torque values diligently.
How To Fix Improper Torque Specifications
To address improper torque specifications, it is crucial to follow the manufacturer’s recommended torque values diligently. Always refer to the service manual for the specific torque specifications for the head bolts. Use a torque wrench to ensure accurate tightening of the bolts, avoiding both over-tightening and under-tightening.
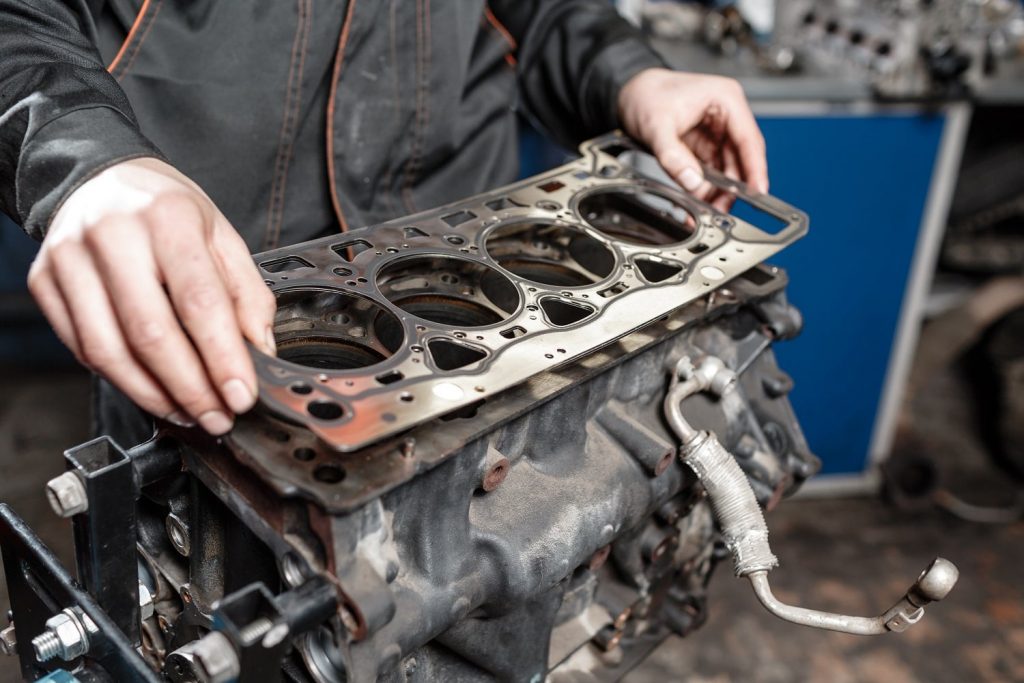
2.Warped or Damaged Cylinder Head
During the head gasket replacement process, it is crucial to inspect the cylinder head for any signs of warping or damage. If the surface is not perfectly flat, it can result in an improper seal, leading to coolant and oil leaks. The cylinder head should be thoroughly inspected and, if necessary, resurfaced or replaced to ensure a proper fit and prevent future problems.
How To Fix Warped or Damaged Cylinder Head
How To Fix Warped or Damaged Cylinder Head
If the cylinder head shows signs of warping or damage, it should be thoroughly inspected. Depending on the severity, the cylinder head may need to be resurfaced or replaced. Resurfacing involves machining the cylinder head to restore a perfectly flat surface, ensuring a proper seal between the head gasket and the engine block.
3. Coolant System Issues
A head gasket replacement often involves disconnecting and reconnecting the coolant system. Improper bleeding or trapped air pockets can cause overheating and result in engine damage. It is essential to properly bleed the coolant system after the repair to eliminate any air pockets and ensure proper circulation. Additionally, inspect the radiator, thermostat, and water pump for any signs of malfunction that could lead to coolant-related problems.
How To Fix Coolant System Issues
Proper bleeding of the coolant system is essential to eliminate trapped air pockets. Follow the recommended bleeding procedure provided in the service manual to ensure that all air is removed from the system. Additionally, inspect the radiator, thermostat, and water pump for any signs of malfunction or damage. Replace any faulty components to prevent coolant-related problems.
4. Ignition and Timing Problems
The process of replacing the head gasket may require removing and reinstalling various components, including the timing belt or chain. If these components are not aligned correctly or if the timing is off, it can lead to misfires, poor engine performance, and even severe internal damage. Ensure that the ignition timing is accurately set and that all relatable components are properly installed to avoid these issues.
How To Fix Ignition and Timing Problems
Ensure that the ignition timing is accurately set after reinstalling components such as the timing belt or chain. Use the appropriate tools and follow the manufacturer’s instructions for aligning the timing marks correctly. Double-check the installation of spark plugs and ignition coils to ensure proper connection and functionality.
5. Oil Leakage
Faulty installation or damage to the head gasket can result in oil leaks. It is crucial to inspect the gasket and ensure that it is properly install and that the mating surfaces are clean and free from any debris. Additionally, check for any damaged or worn seals that may need replacement. Timely detection and repair of oil leaks can prevent further engine damage and maintain optimal performance.
How To Fix Oil Leakage
How To Fix Oil Leakage
Inspect the head gasket thoroughly during installation to ensure it is in good condition and properly installed. Clean the mating surfaces of the engine block and cylinder head to remove any debris or old gasket material. Replace any damaged or worn seals, such as valve cover gaskets, to prevent oil leaks. Regularly monitor oil levels and inspect for any signs of leakage, addressing them promptly if detected.
6. Misfires
According to google misfire is one of the most significant problem after gasket replacement. Misfires occurs when the combustion process in one or more cylinders is disrupted. After a head gasket replacement, misfires can occur due to various reasons, such as improper installation of spark plugs, damaged ignition coils, or a misaligned timing belt/chain. Misfires can lead to poor engine performance, rough idling, and decreased fuel efficiency. If you experience persistent misfires after a head gasket replacement, it is crucial to have the issue diagnosed and resolved promptly.
How To Fix Misfires
If you experience persistent misfires after a head gasket replacement, have the issue diagnosed by a professional. Check the installation of spark plugs, ignition coils, and timing components for proper alignment and functionality. It may be necessary to replace faulty spark plugs or ignition coils and realign the timing components to resolve misfire issues.
7. Coolant Mixing With Oil
A damaged or improperly installed head gasket can result in coolant mixing with oil. This can be identified by a milky appearance in the engine oil or coolant reservoir. When coolant mixes with oil, it reduces lubrication properties, potentially causing accelerated wear on engine components. It is important to address this issue immediately, as continued operation can lead to severe engine damage. A thorough inspection, along with the replacement of the faulty gasket, is necessary to prevent coolant and oil contamination.
How to Fix Coolant Mixing with Oil
To address coolant mixing with oil, it is necessary to replace the damaged or improperly installed head gasket. Thoroughly inspect the mating surfaces of the engine block and cylinder head, ensuring they are clean and free from debris. Replace the gasket following the manufacturer’s instructions to prevent coolant and oil contamination.
8. Coolant Leaks
Head gasket replacement involves disconnecting and reconnecting various coolant passages, which can sometimes result in coolant leaks if not properly sealed. Leaks can occur at the gasket itself or at the connections between coolant hoses and the engine. Coolant leaks can lead to engine overheating, loss of coolant, and potential damage to engine components. It is essential to carefully inspect all connections, hoses, and the gasket to ensure proper sealing and prevent coolant leaks.
How To Fix Coolant Leaks
Carefully inspect all connections, hoses, and the head gasket itself for proper sealing. Tighten any loose connections and replace any damaged hoses or gaskets. Ensure that the coolant passages are free from blockages and that the coolant system is properly pressurize by sealing it to prevent coolant leaks.
9. Overheating
Head gasket problems, can lead to engine overheating. A faulty head gasket can compromise the seal between the cylinder head and the engine block, allowing coolant and combustion gases to escape. This loss of coolant and compression can cause the engine to overheat, leading to potential damage to the engine components. If you notice signs of overheating, such as the temperature gauge rising rapidly or steam coming from the engine, it is crucial to address the issue promptly to prevent further damage
How To Fix Overheating
If head gasket problems lead to engine overheating, it is crucial to address the issue promptly. Check for proper sealing of the head gasket and ensure that the coolant system is functioning correctly. Address any coolant leaks, repair or replace damaged components, and monitor coolant levels regularly to prevent overheating and potential damage to the engine.
Also Read : Engine Damage From Over Heating
How long does it take to replace a head gasket
The time need to replace a head gasket can vary depending on several factors, including the specific vehicle make and model, the condition of the engine, and the expertise of the mechanic performing the repair. On average, the process can take anywhere from 4 to 10 hours of labor. However, in some cases, it may take longer, especially if there are complications or additional repairs during the process. It’s important to consult with a professional mechanic who can provide a more accurate estimate based on the specific circumstances of your vehicle.
Conclusion
While a head gasket replacement can resolve significant engine issues, it is important to be aware of potential problems that may arise during or after the procedure. By understanding these common challenges and following the procedures, you can minimize the risk of complications and ensure a successful repair. If you encounter any difficulties or are unsure about any aspect of the head gasket replacement, it is always good to seek professional assistance. With proper care and attention, your engine will continue to run smoothly for miles to come.